UPDATE: This method no longer works after the recent update. MJ has finally patched this bug.
Midjourney (MJ) has transformed the landscape of digital art production with the aid of artificial intelligence (AI), augmenting the artistic abilities of creatives and average joes alike. Undeniably, many of us are eager to share the thrill of crafting stunning art pieces with our loved ones.
However, your friends and family might be hesitant to invest in a Midjourney plan right away. They might prefer to test out the platform before committing financially or simply don’t want to create their own account yet. It would be ideal if they could access your account in a secure manner.
While account sharing isn’t a feature of Midjourney, there is a way to do it with Discord without giving up your password. Midjourney enables you to grant access to your account to other Discord users without revealing your login credentials.
In this article, we’ll walk you through the straightforward process of providing secure access to your Midjourney account, ensuring your sensitive password remains protected. Trust me, it’s easier than you think.
So, let’s dive in.
This guide assumes you already have a Midjourney account. If not, click here.
1) Create a Discord Server
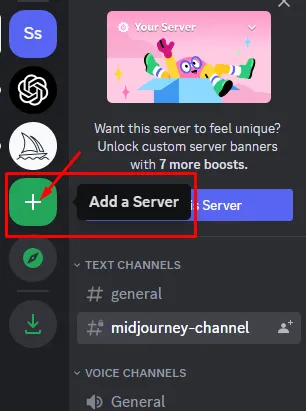
First, open your Discord app on your desktop or mobile device. Then click the ‘Plus’ Button on the left. Hover the cursor on your left side screen and click the green button that says Add a Server.
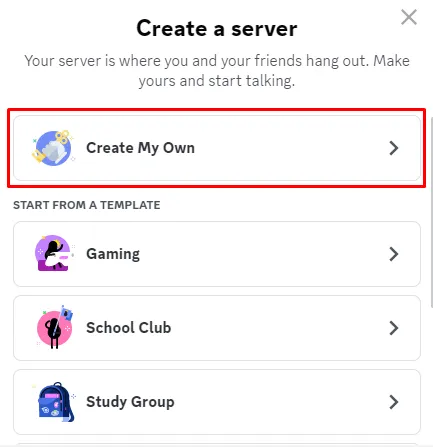
Next, click the ‘Create My Own’ tab.
2) Add Other Users
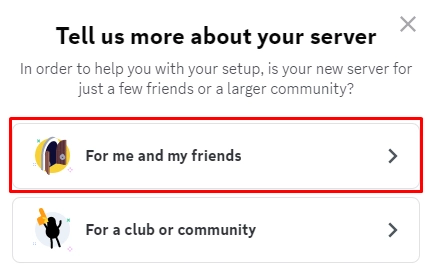
Select Your Server’s Audience. Choose whether you want to create a server for your ‘family and friends’ or for your ‘community’.
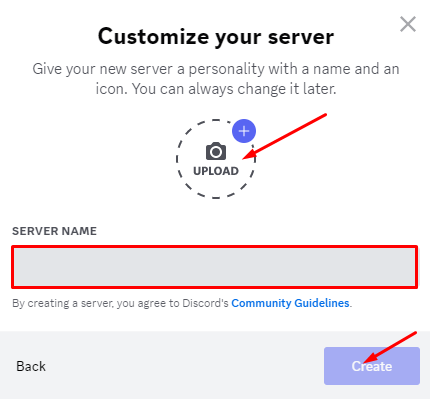
Personalize Your Server. Upload a profile picture and create a name for your server. Once done, hit the ‘Create’ button.
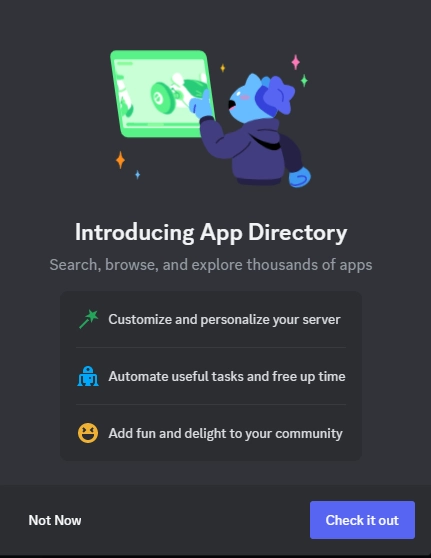
Customize Your Server with Apps (Optional). If you want to see all the available customization options for your server, click the ‘Check It Out’ button to explore Discord’s app directory. You may also skip this step if you want to do it at a later time. To skip, click the ‘Not Now’ button.
Invite Friends to Your Server. You have two ways to invite your friends, families, or colleagues: Enter their Discord name or send them a ‘Server Link Invite’.
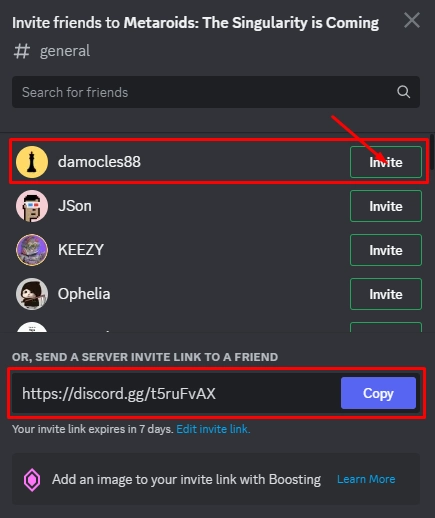
3) Connect the Midjourney Bot to Your Server
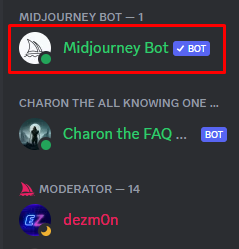
Click the Midjourney Bot. Hover the cursor on your right side screen and select the MJ bot.
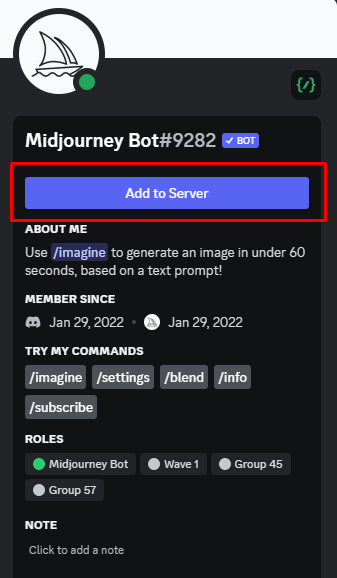
Next, select the ‘Add to Server’ button.
Choose a Server. Select the server where you want the MJ bot to be added, and click ‘Continue’.
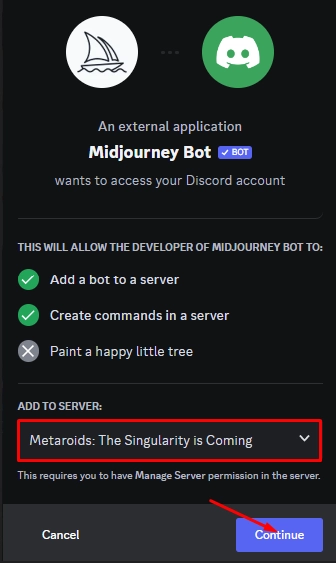
Select the ‘Authorize’ Button. Before authorizing the transaction, you may want to customize the permissions you’ll grant on the MJ bot. Simply check or uncheck the aspects provided on the list.
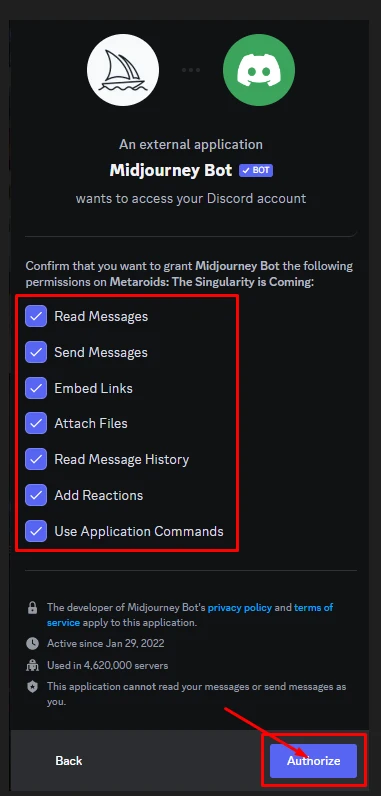
MJ Bot Has Now Been Connected to Your Server. At last, you and your members now have your very own server. But wait, your members can’t prompt images yet until you finish the last step.
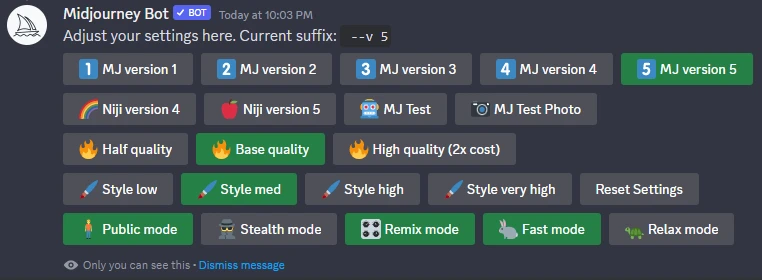
4) Create a New Text Channel
Click the Dropdown Bar. Hover your cursor on your server’s name and select the dropdown bar to reveal all the available options.
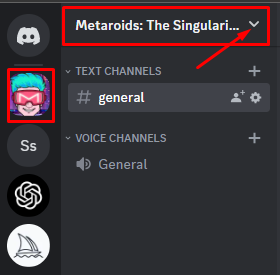
Select ‘Create Channel’. From there, click the ‘Create Channel’ button.
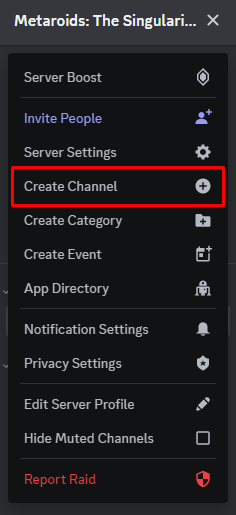
Choose the ‘Text’ Channel. You’ll be presented with two types of channels called ‘text’ and ‘voice’ channels. Select the Text Channel Type, input a channel name, and if you want to, set it to private.
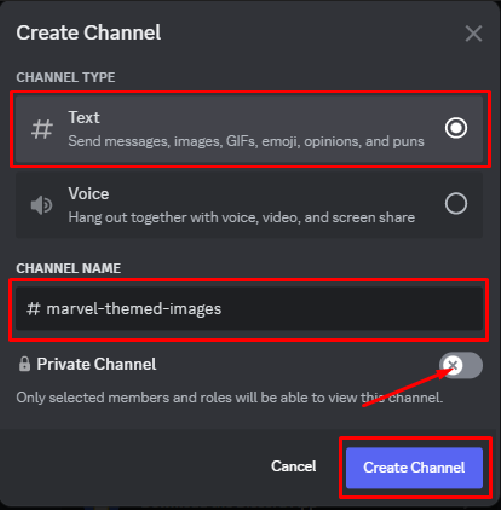
If you set it to private, be sure to add all members and the Midjourney bot, otherwise, they won’t be able to use the Midjourney API.

Once done, click ‘Create Channel’. Now, you and your members can create stunning images with Midjourey using your account. Note that they will consume your fast hours so teach them some moderation.
You may also like:
Master AI Art Generation with Midjourney
Midjourney’s trajectory mirrors Apple’s legendary ascent. Mastering how to use it today is crucial to dominating in the future as a creative.
Join the NeoBlush Midjourney newsletter and become an AI juggernaut.

