
JPG Store is the type of NFT marketplace that stands behind the same ideologies as Cardano, with a passion for innovation and offering new functionality in the Cardano NFT space, also known as CNFT (not to be confused with the CNFT.io marketplace).
It has a simple interface that is user-friendly, allowing beginners to easily navigate their way through. This article serves as your full resource for everything related to JPG Store, whether you want to buy or sell NFTs, create your own collection, launch your project on the platform, or are just curious to learn.
We got you. And we shall update this post periodically to match the changes in the platform.
If you are new to NFTs, you might want to check out our NFT guide first. Moreover, you’ll need a web3 wallet that runs on Cardano, such as Nami, if you want to transact.
What is JPG Store?
The JPG Store is the largest non-custodial NFT marketplace in Cardano that allows users to create digital assets, buy and sell collectibles, and explore the works of other creators seamlessly.
The marketplace embodies three core values: artist first, community-driven, and the Cardano ethos (which it has adopted). All these reflect the design, programs, and connections built within the platform.
It also positions itself as more than just a marketplace but a platform that helps the Earth heal through NFTs. JPG Store contributes one percent of its total revenue to support environmental-related projects, creating a strong impact on society and its future.
Now let’s dive deep into the platform itself and its intricate features.
Logging In (Cardano Wallet Needed)
Logging into the JPG store requires a Cardano wallet. There are only six options to choose from: Nami, Eternal, Flint, Gero, Typhon, and NuFi.

After creating your Cardano wallet, go to the JPG store and hit Connect Wallet, which you can find in the upper right corner of your screen.
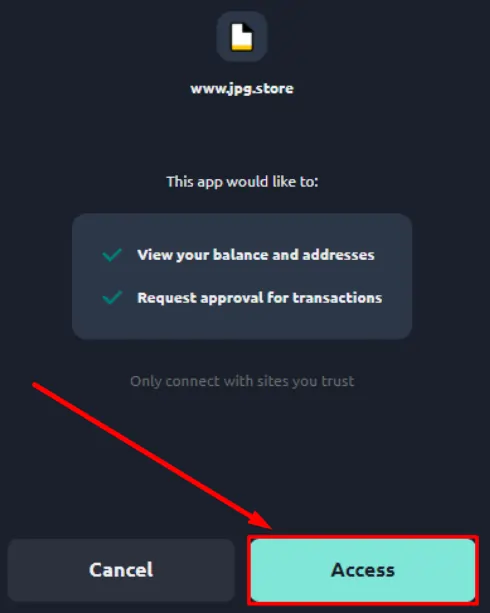
You’ll see the supported wallets on the website; choose Nami or any available options. Your wallet account will appear on your screen, asking for your confirmation to connect to the marketplace. Click Access to proceed.
Success! You have now logged into the JPG Store through your wallet.
Collections
An NFT collection, as the word implies, is an assortment of NFTs made by a single entity or creator and contains a set amount of individual assets. For instance, Clay Nation is a collection of 10,000 individual NFTs.
These collections can consist of anything, from images, to video clips, to audio files, you name it. But the vast majority of them happen to be artworks or collectibles. Collectors usually individual NFTs from these collections for various reasons, including to represent themselves, make money through flipping, or take advantage of their underlying utilities; there are limitless possibilities.
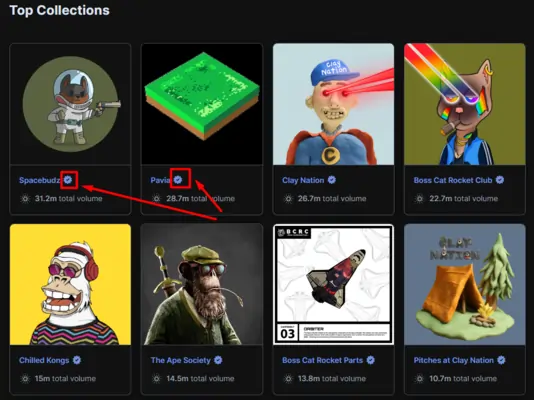
Some NFT collections have the verified badge, represented by a checkmark right after their names. This serves as evidence that the NFTs are the original and official versions being sold. While it certainly helps buyers avoid purchasing fake assets, verification doesn’t signify that a particular project has high potential.
If you have a collection and want to get verified on the JPG Store; check out the steps here.
Creator Royalties
While the space is currently debating the future of NFT royalties, JPG Store still strongly supports it.
Creator royalties are commissions that project owners receive for every sale that goes on in the marketplace. For instance, if I sell a Chilled Kong NFT for 1000 ADA and the royalty is set at 5%, that means that the Chilled Kong founders will get a 50 ADA cut from the transaction.
Project creators can freely decide the percentage they’ll receive in every sale, which is why NFTs in the JPG Store have varying royalty fees. The platform calculates the creator’s share and distributes it automatically to their wallet address.
The Marketplace
The marketplace section is where you can buy or place bids on NFTs you find interesting. You can access the marketplace here to explore the different listings.
Familiarizing yourself with the marketplace features can go a long way if it’s your first time. You can start by scrolling down the page to discover various NFTs. The search bar allows you to type in a particular NFT or project, as well as help you explore new ones based on your chosen keywords.
If you want to filter out your search to one or a few collections, click on Collections and choose which projects you want to be involved in your search. It is common practice to sort the listings according to Price: Low to High, that way, you can aim for floor prices and buy the cheapest available in a collection.

Moreover, it has customizable parameters to help narrow down your search. Other parameters include recently listed, verified and unverified collections, etc.
You can also toggle the minimum and maximum prices if you’re on a budget. Just play with it.
Launchpad
The JPG Store Launchpad is a platform that enables creators to launch their Cardano NFT mints while leveraging its various offerings and community of NFT traders. The launchpad supports projects through guaranteed verification, mentorship, social media engagement, and scam prevention tips.
Lastly, the JPG Store determines who passes the application. Although not everyone can be a part of the program, it ensures that the support and resources the team has will benefit the applicants.
If you want to apply for the Launchpad, click here.
As for NFT traders, you can participate in mints conducted on the platform through the Launchpad as well.
How to Buy NFTs on JPG Store
JPG Store enables enthusiasts and investors to buy Cardano NFTs seamlessly through their web3 wallets. But before you can do that, you need to ensure that you have enough funds stored in your Cardano wallet.
Once you’re ready, follow the steps below to buy a digital asset:
Connect to JPG Store
First and foremost, visit the JPG Store and connect your wallet. Choose any of the available options. Note that we’ll be using Nami in this example.
Choose an NFT
Visit the marketplace to choose an NFT you want to buy. If you’re eyeing something, go directly to the search bar and type its name. Alternatively, you can explore the page to find anything that catches your eye.
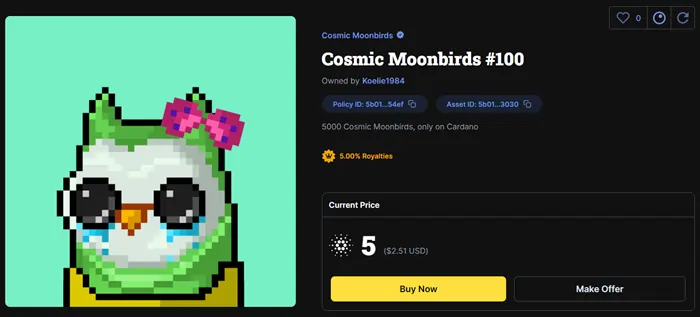
Buy the NFT
The marketplace is like a vast world, but there’s always an NFT for you. Once you’ve decided on the asset to purchase, click on it to see all its details. As you can see, the page shows the price of the NFT.
In this case, you have two choices, either Buy Now or Make [an] Offer. Making an offer may allow you to acquire NFTs for a cheaper price, but you’ll have to wait for the seller to approve, and that’s a big if. But most buyers simply choose the alternative because it’s instant and guaranteed, so we’ll do that in this example.
Click Buy Now to proceed. Your wallet will pop up along with the total fee, asking you to sign the transaction. Tap Sign and input your password.
Wait until the platform completes the transaction process. Check your JPG Store profile or wallet to see your NFT.
Congratulations! You now own an NFT.
How to Sell (or List) NFTs on JPG Store
Owning an NFT means you can do whatever you want with it, including selling it for a profit. If you want to list your digital assets on the JPG Store, here’s how to do it:
Link your wallet to JPG Store
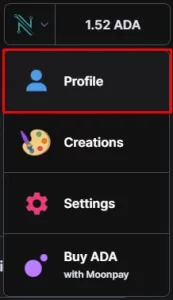
Head to the website and connect your Cardano wallet. Once it’s linked, access your profile to see the NFTs you hold.
Sell your NFT
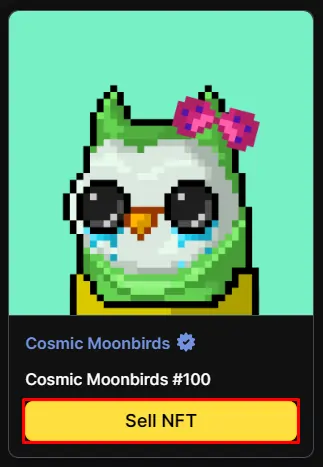
The website will automatically direct you to your NFT holdings. Choose the digital asset you wish to list in the marketplace by tapping the Sell NFT button. In this example, we are about to list the Cosmic Moonbirds we just bought.
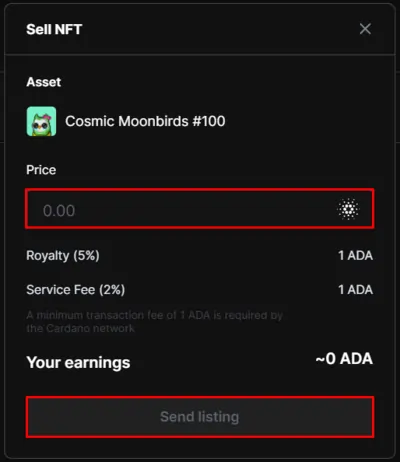
Set your price
You can set the NFT price by typing it in the empty bar. Note that the platform implements a 2% service fee while royalties vary from one project to another. Tap the Send Listing button to proceed.
Wait until the platform completes the process. You can always check your listed NFTs on your JPG Store profile under the For Sale tab.
How to Create an NFT on JPG Store
Creating an NFT is both a fun and rewarding experience. But beginners often find it intimidating to get started. If it’s your first time creating a non-fungible asset, the JPG Store should make things a lot easier for you. Follow the steps below:
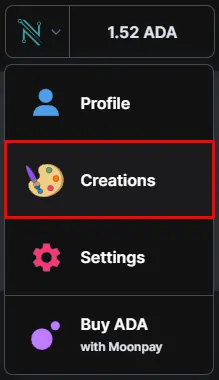
Go to Creations tab
You can find the Creations tab in the upper right corner of the JPG Store website. Click it to proceed.
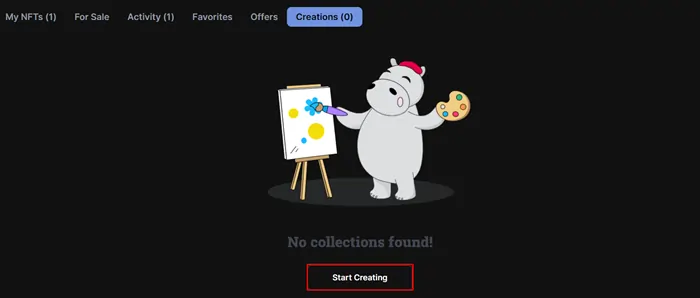
Go to Collections
The website will direct you to the next page, where your created assets will soon be displayed. For now, we don’t have anything yet. Hit the Start Creating button to continue.
Create a Single NFT
Currently, the JPG Store only allows users to create single NFTs but the bulk collections offering will soon come. Note that there is a mint and network fee for every digital asset.
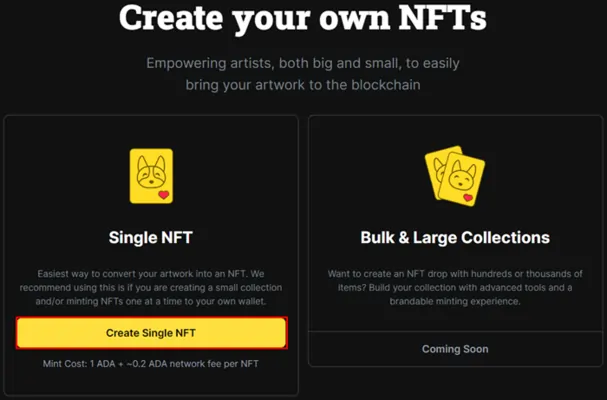
Since this is a new NFT we’re creating, choose Create new Policy ID. Alternatively, if you want to add an asset to an existing collection, click the Add to existing Policy ID button.
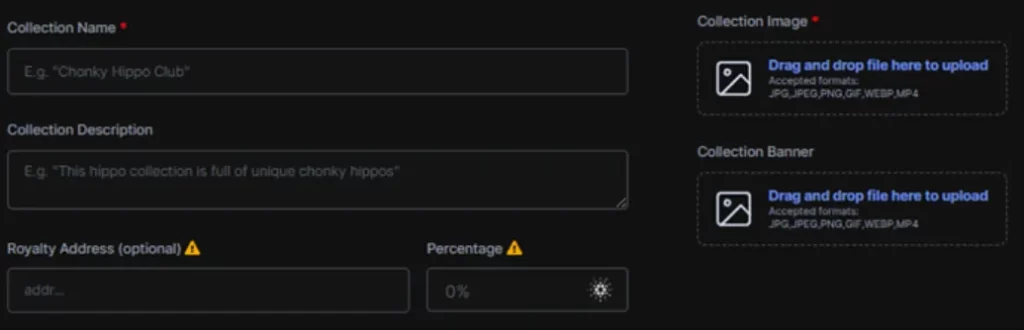
Set Up Your Collection
If you have a catchy name for your collection, now’s the time to use it. Fill in all the necessary information and click Save once you’re finished.
Sign the process by typing your password. Wait until your screen confirms the successful creation of your NFT.
Then move to the next page by giving your asset a name and description. Don’t forget to attach the artwork file. Mint the NFT and pay the fees. You can always add additional collectibles if you want. Alternatively, click Done.
And that’s it! Be a good creator who rewards your community well.
Join our newsletter as we build a community of AI and web3 pioneers.
The next 3-5 years is when new industry titans will emerge, and we want you to be one of them.
Benefits include:
- Receive updates on the most significant trends
- Receive crucial insights that will help you stay ahead in the tech world
- The chance to be part of our OG community, which will have exclusive membership perks
